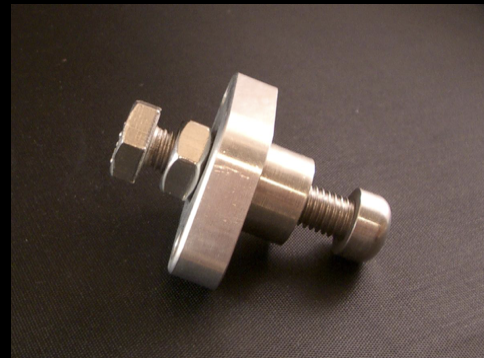
Instructions:
Removing the Existing Cam Chain Tensioners:
Front: Unbolt the mounting nuts. The oil pipe bracket will need to be bent out of the way to remove the ACCT. Kawasaki recommends removing the oil pipe, however, our experience has been that this is not necessary.
Rear: You need to remove the Coolant Reservoir Tank to access the rear tensioner.
Installing the new tensioner:
Ensure the plunger is retracted fully before installing then install the tensioner and o ring. Make sure you have not started the bike or rotated the engine while the tensioner is removed from the bike.
Install the MCCT and tighten the hold down nuts.
Next, turn the adjusting bolt by hand (the one sticking out the back of the tensioner) until you feel some resistance. At that point, you can lightly snug down the locking nut to lock the adjusting bolt in place. If you do not snug down the locking nut, when you start the bike the adjusting bold will back itself out.
Start the bike, loosen the locking nut, and adjust the adjusting bolt to make the bike ‘run quietly’. This is more of an art than a science, so the best I can tell you is to fiddle with the adjusting bolt – backing it in and out – until the bike sounds right. The extremes are – too tight, and you stretch the chain and excessively wear the chain guide. Too loose, and the chain will slap around possibly damaging the inside of the engine, or jumping a gear on the camshaft sprocket, potentially ruining the engine. The adjustment is not *that* particular, and the extremes are pretty obvious, so the adjustment becomes fairly straightforward once the bike is running.
Back the bolt out until the bike make noise, then tighten the bolt until it quiets down, but not too much. Then tighten the locking nut and you are done!
Repeat on the other side.

Reviews
There are no reviews yet.